
How to Convert Excel Charts to TIFF Images
Having trouble making sure your graphics and images are just right for your publication? Academic publications including medical journals and web publications will often require high-resolution graphics and images. When submitting an article that contains excel document charts for publications, these charts are often required to be submitted as separate TIFF images, and often need to meet strict requirements regarding the resolution, width and height of the resulting TIFF image.
The tutorial below will demonstrate how to easily convert excel document charts to TIFF images to the exact specifications required.
How To Convert Excel to TIFF
Manipulating an excel chart can be difficult because Microsoft Excel will automatically scale charts to fit to the page when it prints them, preventing you from creating a TIFF image at the size you require from within Excel.
This is easily fixed by first creating the chart in Excel, and then copying that chart into Microsoft Word, PowerPoint or Publisher. By copying the chart into Word and then using TIFF Image Printer‘s trimming options, we can easily create the exact sized TIFF image we want.
Step-by-Step Document Conversion Process
If you don’t already have access to our TIFF Image Printer, you can follow along with the step-by-step process by downloading our 30 day trial.
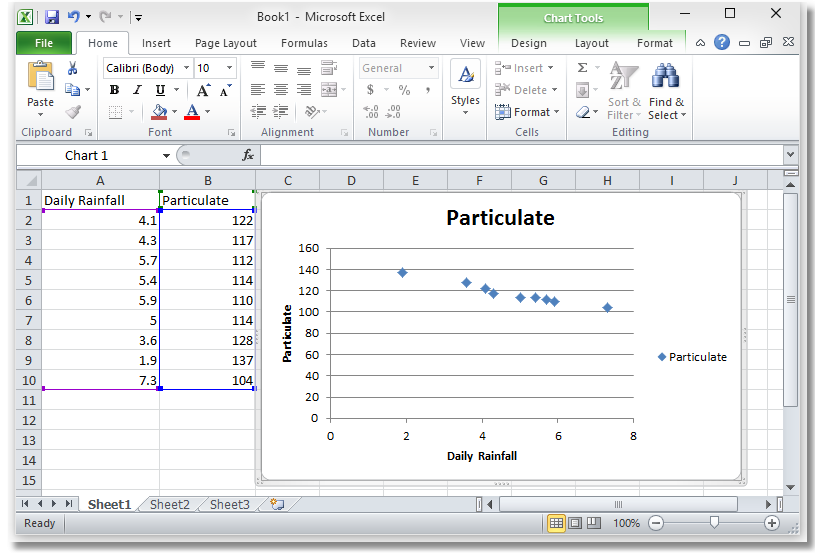
- Open your Excel spreadsheet that contains your completed chart. Make sure the chart is an embedded or floating chart, and not on its own sheet.

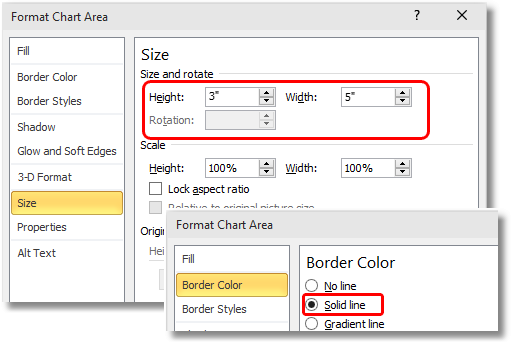
- Right-click the chart and select Format Chart Area to set the size of your chart. Our sample chart is set to a height of 3 inches and a width of 5 inches and has a border. This border is required as it is used later to create the resulting TIFF Image from the Excel chart at the correct size.

- Once the Excel chart is the desired size and it has been formatted the way you want it to look, the next step is to copy the chart into an empty Microsoft Word document. You could also use Microsoft Publisher or Microsoft PowerPoint for the next steps if you are more familiar with those tools.
- Leave your Excel spreadsheet open and create a new, blank Word document. Then go back to your Excel spreadsheet and right-click your chart and select Copy from the context menu to copy the chart to the clipboard.

- Go back to your blank Word document. On the Home tab, click the Paste button to paste the chart onto the blank page. It doesn’t matter where on the page you place the chart.

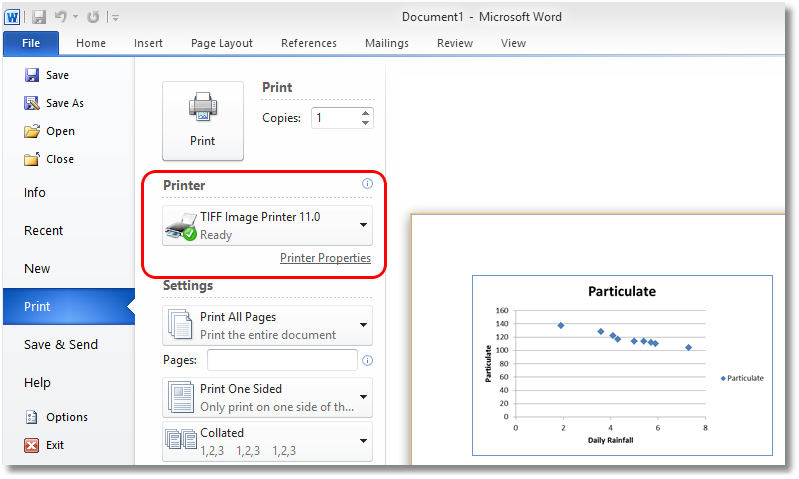
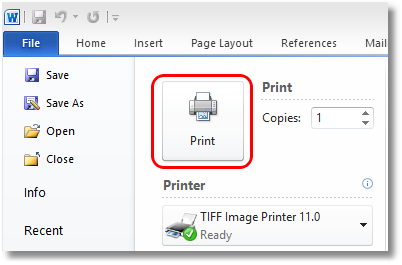
- Now that the chart is in Word, we can print the chart to the convert to TIFF software to create a TIFF image. From the File menu, select Print to bring up the print options. A preview of your chart is shown. You will see that Microsoft Word is placing this chart on a letter-sized page. We will use the trimming features in TIFF image printer to automatically trim the extra space around the chart, leaving us with our correctly-sized TIFF image of our chart.
- Select the TIFF Image Printer as the desired printer and then click the Printer Properties link below to set the TIFF trimming options and the resolution.

- Select the TIFF Image Printer as the desired printer and then click the Printer Properties link below to set the TIFF trimming options and the resolution.
- On the TIFF Image Printer 11.0 Properties dialog:
- On the Paper/Quality tab, click the Advanced… button in the lower right corner.

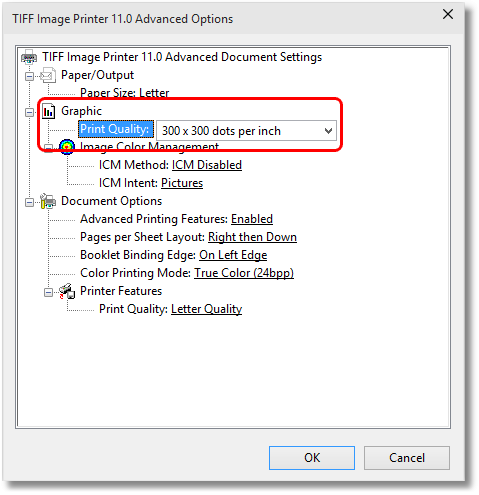
- On the TIFF Image Printer Advanced Options dialog, set the Print Quality to 300 x 300 dots per inch and click OK to save the changes.

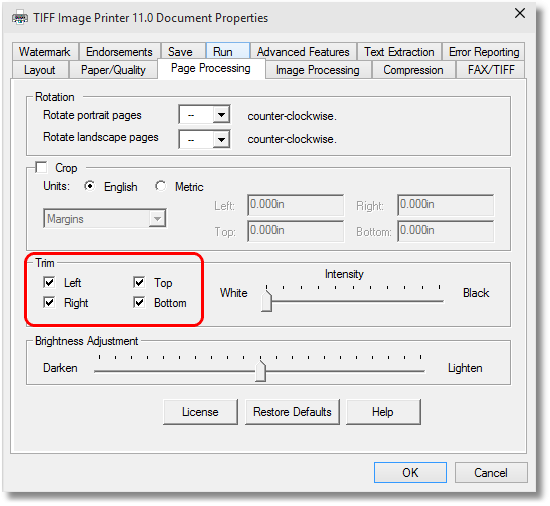
- Back on the TIFF Image Printer Document Properties dialog, select the Page Processing tab and place a checkmark beside the trimming options for Left, Top, Right and Bottom.
- Click OK to save these settings.
- On the Paper/Quality tab, click the Advanced… button in the lower right corner.
- Now that the printing properties have been set, click the Print button to print the chart to the TIFF Image Printer.

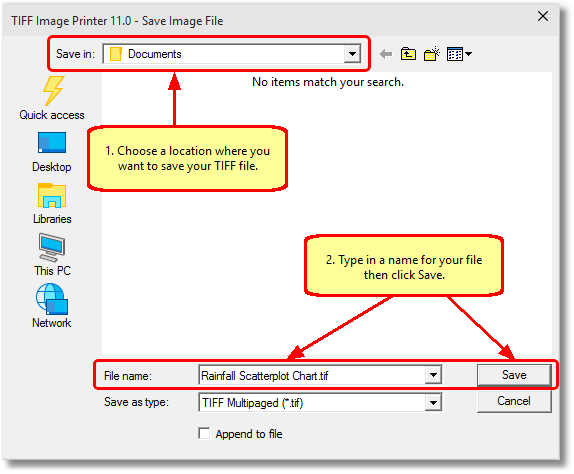
- A Save Image File prompt will appear. If you cannot see this dialog, look for a new icon in your taskbar as it may have appeared behind another window.
- Choose a file name and the location in which to save the file.
- Click Save to save the new TIFF image.


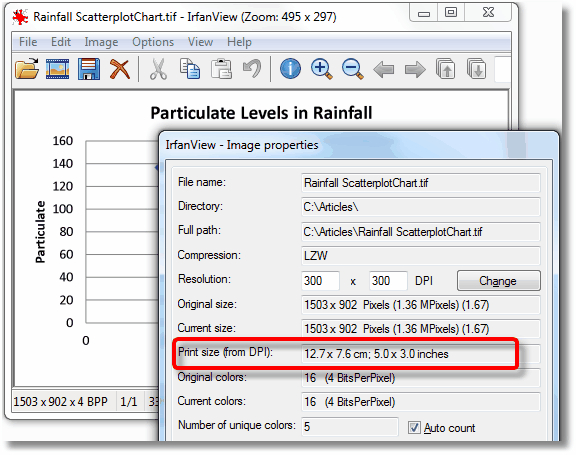
Your new TIFF image has been created at the same size as the original chart that was designed in Excel.
And that’s how it’s done!

The TIFF Image Printer isn’t only restricted for use to convert excel to TIFF images. If you need an easy way to convert any windows file type, control your output settings, produce high quality TIFF images at small file sizes, perform image adjustments like resize, rotate, crop, and trim, PEERNET’s TIFF Image Printer is the right tool to help you improve your business processes.
So whether you’re looking for a PDF to TIFF converter or looking to convert any Windows document to TIFF, learn more about our TIFF Image Printer or download a 30 day trial today!
