
Adding Header and Footer Text to Each Page
Adding header and footer text to your documents enhances the readability, organization, and overall professionalism and presentation of your content.
Our TIFF Image Printer, Raster Image Printer, and PDF Image Printer all allow you to add text to the header and/or footer areas of your created PDF files, and TIFF and other image formats
Why add Header and Footer Text?
Headers and footers are distinct parts of a document page. The top margin of your document is the header, and the bottom margin is the footer. They often contain information that is the same from page to page.
Header text commonly includes the document name, the name of the author or creator, company logos, and other branding elements. A footer, meanwhile, often includes page numbers, contact information, and legal details.
Branding
Adding header text for taglines, logos, and brand colors helps establish brand recognition, visibility, and accountability. They can also lend a more polished and professional look to your document.
Document Identification
Add the document title, author, date, or version information as part of your header text to make it easy to identify and organize the document. This can be essential when converting documents to PDF or TIFF images for archiving and digital storage. Using version numbers helps when sharing and editing project reports or policy manuals that can go through many iterations as part of a multi-user editing process.
Contact Information
Adding footer text with contact details, such as a physical address, phone number, and email address, makes it easy for users to get in touch with the creator of the content.
Copyright
Footers often contain copyright notices, disclaimers, terms of use, privacy policies, and other legal information. This helps protect intellectual property rights, outline usage terms, and inform users about their rights and responsibilities.
How to Add Header and Footer Text
We are using TIFF Image Printer here, the steps are the same for Raster Image Printer and PDF Image Printer.
PEERNET’s trio of image printers rely on printer profiles to define the file formats they generate. All options, including text watermarks, are controlled through the settings in these profiles.
To set up the text watermark options in a profile, the initial step is to create a new profile or to edit an existing one.
To access all features for your printer, simply double-click the Dashboard desktop shortcut. On the Dashboard, you will find license information, tools, and resources, as well as the ability to create and edit profiles.

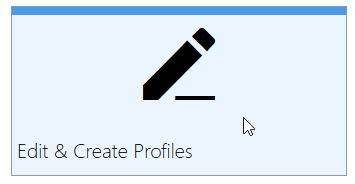
In the Dashboard. click the Edit & Create Profiles tile to open the Profile Manager tool.
Creating and Editing Profiles
The Profile Manager tool is where you create and edit the profiles used by the printer. Each printer includes profiles created by PEERNET to start you off. You can create your own personal profiles from scratch using the Add new profile button. You can also start with a copy of an existing profile using the copy icon on the profile tile. By using profiles, you have easy access to creating multiple different types of files.
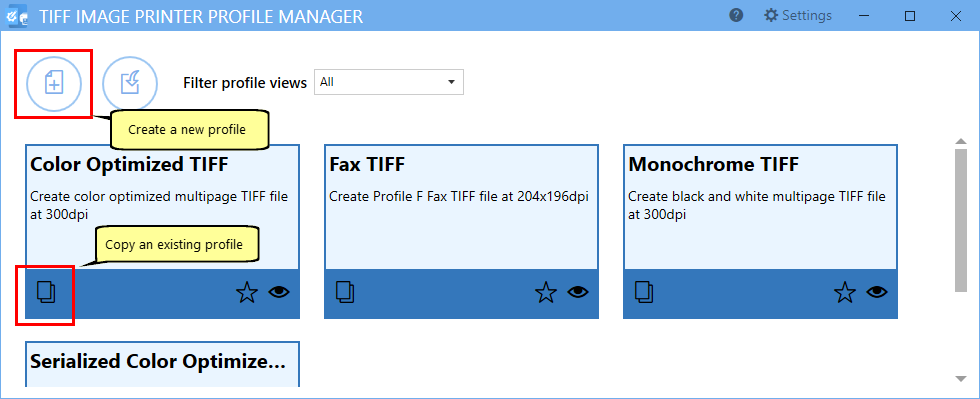
New profiles automatically open in edit mode. It’s a good idea to give them a name you will remember and add a short description. Do that first at the top of the editor before making any other changes to the profile.
Header or Footer Text is a Text Stamp
With our image printers, text can be added to your pages using our Stamping features. Stamps include text, images, and custom text stamps for page numbering and date and time information. You can align, position, and rotate any stamp on the page as you need. Additionally, you can select specific page sets on which to include each stamp.
Adding Header or Footer Text
Here, we show how to add footer text to the bottom middle of every page using the Text stamp. To add header text as well, simply add another text stamp and position it at the top of the page. You can add, position, and layer as many stamps as you want. For left and right-aligned text in a header or footer, again, just use multiple text stamps positioned accordingly.
To start, select Stamping on the left-hand side to see the options on the right. Add a text stamp using the first stamp option, Text. Once added, the text stamp is opened for editing.
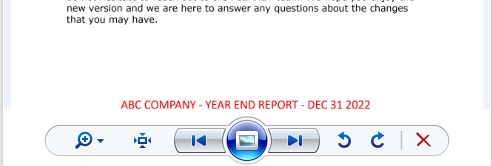
On the first tab in the editing section, type in the text you want to include in your stamp. We are changing ours to “ABC COMPANY – YEAR END REPORT – DEC 31 2022“.
Other display options are the font, size, and color of the text. For our footer text, we have chosen the font Calibri, red, and a font size of 16.

Positioning the Footer Text
Now, we will move to the Position tab to set the footer text on the bottom center of each page using the horizontal and vertical alignment options. Other position options available are offsetting and rotating the stamp, neither of which we use here.
Lastly, choose which pages to add the stamp to, and any transparency to apply to the stamp.

Saving and Using the Profile
Save your profile using the Save button in the upper left when your changes are complete. Now when you print documents to the printer using this profile, you will have a text stamp in the footer of each page.
If your page has standard 1-inch margins, this stamp will appear in the footer area, but the Stamping tool does not reserve space for the stamp. When you have a page with no margins or very small margins, then the stamp will be layered over the page content. If you have non-traditional margins and need to reserve space for a stamp in the header space, please go to the Page Resizing tab and add borders to the page.
If you plan to use these settings regularly, you may wish to make this personal profile the default profile so that it is always used when printing.

