How do I create a black and white image from a color file?
Question: How do I create a black and white image from a color file?
Answer: You can configure the TIFF Image Printer to create black and white images with the steps outlined below.
How to do this:
- Open Devices and Printers (or Printers & Faxes on older operating systems).
- Right-click on the TIFF Image Printer, then click the Printer Properties item from the context menu.
- On the Advanced tab, click the Printing Defaults button in the lower left corner.
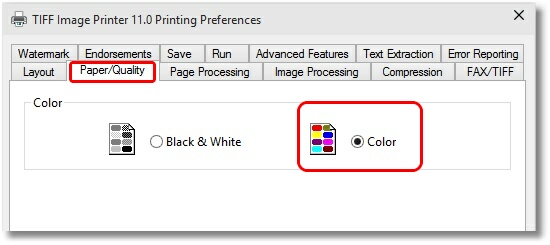
- In the TIFF Image Printer Printing Preferences dialog, click on the Paper/Quality tab, then select Color.

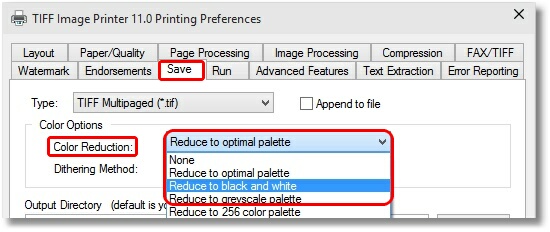
- Click on the Save tab and select “Reduce to black and white” for Color Reduction.
- You may also need to experiment with the dithering methods as the default of Halftone may not produce the image quality depending on the original color image. Floyd-Steinberg and Burkes are good dithering methods that work well for most images.

- Click Apply and then Ok to save the changes.
- Back in TIFF Image Printer Properties dialog, click the General tab.
- Click the Preferences button at the bottom.
- On the TIFF Image Printer Printing Preferences dialog, click the Paper/Quality tab, then select Color.
- Click on the Save tab and select “Reduce to black and white” for Color Reduction. If you made any changes to the dithering method in Step 5 above, make the same change here.
- Click Apply and then Ok to save the changes.
Now all files printed to the TIFF Image Printer will create black and white TIFF image files.
