Options Tab

Contents
Each time you print to the Convert to PDF printer the Convert to PDF application will launch showing you the Options Tab. The three main sections of this screen are outlined and explained below.
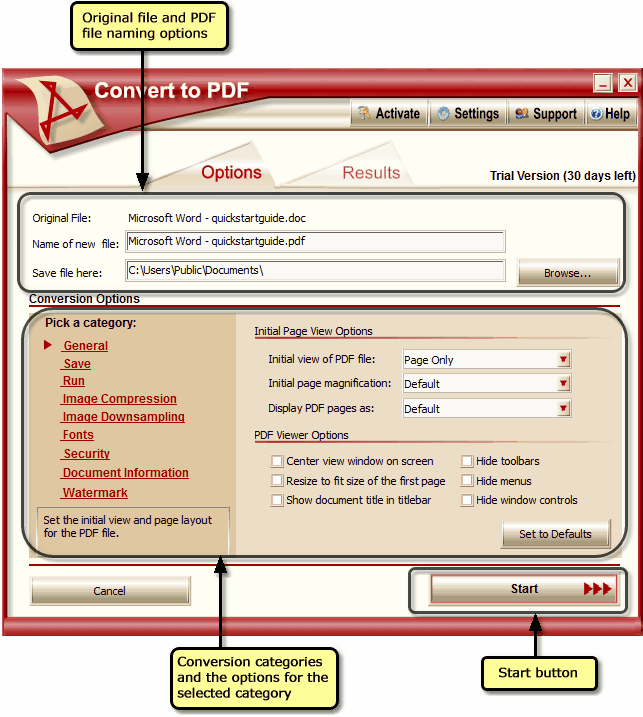
Original File and File Naming Options
This area shows the name of the original document sent to the Convert to PDF printer. From here you can specify the name of the PDF you are creating as well as where you want to save the file. The Browse… button can be used to change where the files are saved.
Original File - this is the name of the file that was printed to the Convert to PDF printer.
Name of new file - enter the name of you want to use for your PDF file. The following characters cannot be used as part of a file name: / * ? " < > | : \.
Save file here - this is the location where your PDF file will be saved. Use the Browse... button to look for a different folder on your hard drive, or type a new location into the edit field. If the folder does not exist, you will be prompted to confirm that you wish to create it.
Browse - displays the standard Browse for Folder dialog allowing you to find a folder on your computer. Use this button to change where you are saving your PDF files.
Conversion Categories and Selected Category Options
This area lists the different categories of PDF creation options that can be configured. The red triangle to the left of the category list indicates which category is displayed in the right-hand side panel. Click on any of the categories to choose it and show its options in the panel to the right.
Start Button
When you have set the file naming and conversion options, click this button to start creating your PDF file. Clicking on the Results tab will also start creating the PDF file. When Convert to PDF starts to create the PDF file, you will automatically be moved to the Results tab.
Cancel Button
Cancels the PDF creation and closes the Convert to PDF application.